Desktop
Application Desktop
Why the Desktop ?
The HRT application Desktop replaces the old Main Menu .
The Desktop gives you the same functionality as the old menu but in addition to this, it allows you to customize your desktop to suit your personal needs and working style.
The aim of the new Desktop is, not only to provide a more modern style and layout, but to make it more easy to use for our users by allowing them to adapt the Desktop to how they work.
For instance, a planning officer may mostly use the planning reports and SMT reports. With the Desktop he can create his own welcome page with exactly those reports just one click away. A Training Office might instead whish to put the training reports on his welcome page.
Not only can you reorganize the normal reports in a manner that suits you best but you can also put stored reports or Information Center reports on your personalized Desktop. You can even put any hyperlink you consider relevant on the Desktop.
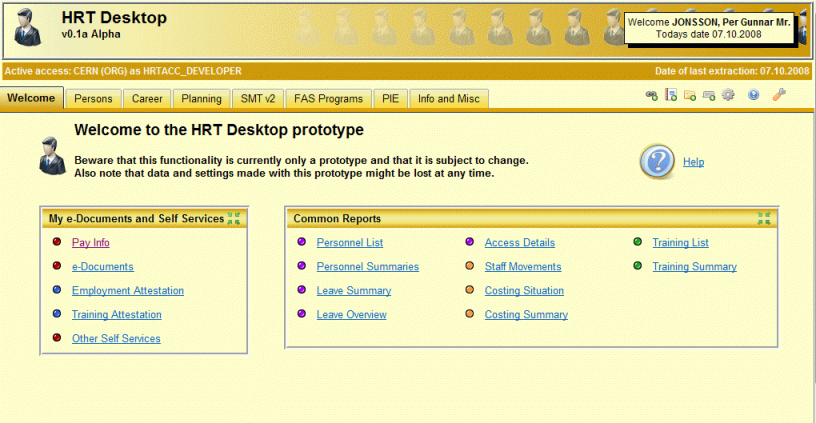
Below is an example of the standard Desktop layout at the time this documentation was written.
Supported Browsers
HRT and the HRT Desktop is supported on up to date versions of all the major browsers. The following are the officially supported browsers...
-
Internet Explorer v7
-
Firefox v3.x
-
Opera 9.5x
-
Safari (Windows/Mac) 3.x
It has also been tested on Goggle's Chrome but since this browser, at the time of writing this document, is still a beta version, it is not officially supported.
Also note that for the above browsers we support the standard configuration (in the case of Internet Explorer the CERN standard installation) only. Any configuration changes or add-ons are done/installed entirely at the users responsibility.
General Information
The Desktop page provides you with some general information such as who is logged on, the current access rights and the date of the last successfull extraction.
|
|
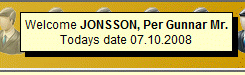
The currently logged on user can be found together with today's date in the top right corner of the Desktop. |
|
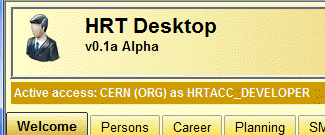
The currently selected access right(s) of for the logged on user can be found in the upper left corner of the Desktop. |
 |
|
|
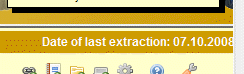
The date of the last successfully executed data extraction can be found in the upper right corner of the Desktop, just below the display of the currently logged on user. |
Tabs
The main part of the desktop is divided into a set of tabs. Each tab contains a set of reports logically grouped together. You can navigate between the tabs by clicking on the tab handle at the top of the Desktop just below the Desktop header.

In the various tabs for Persons, Career, Planning etc. you will find all the reports available in HRT. Note that not all reports may be available to you dependant on your access rights to HRT.
In addition to this, the most commonly used reports are also found on the Welcome tab.
Notice that the reports are grouped into two link groups. More about link groups will follow in the chapters below.

You can also modify the welcome page, create your own tab(s), links groups and generally organize your favorite reports and links as you whish. More about that under Customizing The Desktop.
Toolbars, Context Menus and Drag & Drop

 Much
of the functionality of the Desktop is activated from the toolbar at the top
right corner of the Desktop, using right click to activate context menus or
simply by dragging and dropping items around.
Much
of the functionality of the Desktop is activated from the toolbar at the top
right corner of the Desktop, using right click to activate context menus or
simply by dragging and dropping items around.
To activate commands from the toolbar, just click on the desired icon. The icon over which the mouse is positioned will zoom up slightly and if the mouse is kept over the icon a small explanatory popup text will appear.
To activate a context menu, simply right click on the item for which you whish to activate a context menu. Note: The Opera browser do not properly implement the left click context menu event. Users of this browser must hold the control/command key down while doing a left click to activate a context menu.
Drag and drop can also be used to move items such as reports, hyperlink and link groups around. Simply left click on the item that you whish to move, hold the mouse button down, move the item to the desired position and release it.
Note the following when dragging and dropping...
-
When dragging a report/hyperlink click on the icon to the left of the link and not on the link itself since most browsers do not understand it when you click on the link.
-
When dragging a report/hyperlink into a link group, drop the item on the title of the group since the browser might be confused.
-
When dragging an object out of a link group and onto the tab canvas directly it will be positioned at a default position at the top left corner of the tab canvas.
-
 If you drop a item on the handle of a tab the item
will be moved to that tab.
If you drop a item on the handle of a tab the item
will be moved to that tab.
Services
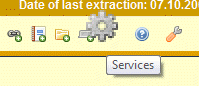 In
the top right corner of the report form just below the header bar, there
is a small link called "Services". By clicking the link, a small menu is
opened. This menu serves as entry point to the most important
application services and is reachable from most parts of the
application. It allows you to quickly reach key services you may want to
use when working with the application.
In
the top right corner of the report form just below the header bar, there
is a small link called "Services". By clicking the link, a small menu is
opened. This menu serves as entry point to the most important
application services and is reachable from most parts of the
application. It allows you to quickly reach key services you may want to
use when working with the application.
|
|
Access SelectionIn HRT, there is the possibility to choose between different access levels. In order to change the currently active access level, the access selection screen needs to be used. After the change of the access level, the current report should be reloaded before typing in any search criteria. Report FolderAllows accessing all stored reports of the connected user. From the report folder, existing stored reports can be launched or edited. From there, stored reports may also be scheduled for an automatic execution. Virtual Unit EditorThe Virtual Unit Editor allows to view, modify or delete existing virtual units or to add new ones. Virtual units allow you to group together information that otherwise would be separate and require either multiple report executions and/or the use of multiple search fields. It is especially useful for scenarios where the same search criteria are used again and again and potentially also in different reports. Information CenterThe Information Center allows you to create your own simple reports targeted at specific purposes for which no standard report is available in HRT. PreferencesIn the preferences screen it is possible to customize certain aspects like the presentations of dates or numbers in the report results. Session InformationThe session information screen shows who is the currently connected user and what are his access levels. NewsAllows to view the latest news concerning the different MDS applications. HelpLink to the general application help pages like e.g. the one you are currently reading. |

Customizing The Desktop
There is many things that you can change, modify and customize with the desktop. But let's first look at what you can not do.
You can not modify any of the standard tabs such as Persons, Planning, Career etc...
So, now when that is out of the way let's see what you can do.
You can freely modify the welcome page and you can create your own tabs and populate the with report and links. The following paragraphs will explain how that is done.
Add a report
|
A existing "standard" report, a stored report or a
Information Center report can be added to the current tab by clicking on the
Add Report
You will then be presented with a dialog box where you can select which report to place on the desktop. You can also select to add a stored report or a Information Center Report by clicking on the choice buttons at the top of the dialog. The new item will be placed at free position on the currently selected tab. If you're current tab is really full with items, the new items may be placed below the bottom edge of the window such that you have to scroll to see it. You can the use drag & drop to move it where you want.
When using a context menu the new report will be placed in the tab or link group from which the context menu was activated. An alternate method for adding reports to your welcome tab or your personal tabs is to use copy paste from any of the standard tabs. More about this under Copy, Paste & Delete |
|
 You
can also use a context menu to invoke the same functionality.
You
can also use a context menu to invoke the same functionality.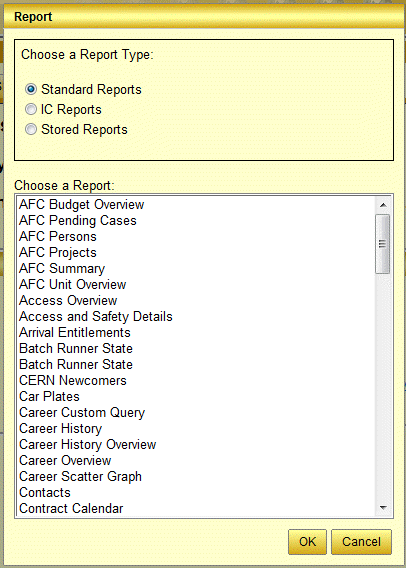
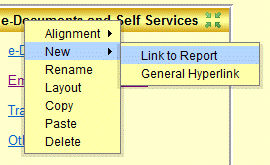
Add a hyperlink
You can also add any hyperlink to your desktop either
using a context menu or by clicking on the Add Hyperlink
![]() icon in the toolbar.
icon in the toolbar.
A generic hyperlink will be placed on your tab canvas or inside the link group if applicable.
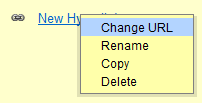 You
can then proceed to give the hyperlink a name of your choice as well as
register the hyperlink itself by right clicking on the hyperlinks icon and
activating the context menus for Change URL and Rename.
You
can then proceed to give the hyperlink a name of your choice as well as
register the hyperlink itself by right clicking on the hyperlinks icon and
activating the context menus for Change URL and Rename.
Add a link group
A link group is a collection of links. You can use link groups to structure the content of your tabs. A link group can be moved around, copied and deleted together with it's links by dragging and dropping it or by activating it's context menu.
Hint, when working with the mouse cursor on a link group always click on the title of the group since otherwise you may click on one of the links in the group instead.
In the same manner as a hyperlink can be added you can
add a link group using the Add Link Group![]() icon in the toolbar or, via a context menu or using copy paste from one of
the standard tabs.
icon in the toolbar or, via a context menu or using copy paste from one of
the standard tabs.
Link group layout and sizing
This functionality is still under evaluation.
Link groups can be laid out horizontally or vertically. The default layout is vertical. However, the layout can be changed using the context menu of a link group. Upon choosing the Layout menu item you will be presented with the following dialog.
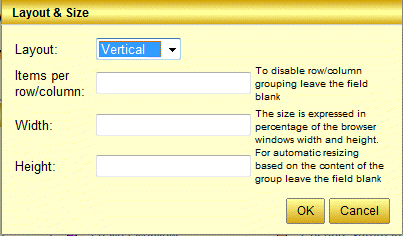
Use the drop down to select whether you whish vertical or horizontal layout. You can also select how many items that are going to be placed in the chosen direction before a new row/column is started.
Finally you can control the size of the link group (in percentage of the browsers window size) by entering the desired percentages in the width and height fields.
Leaving a field blank will cause the link group to revert to default behaviour.
Add a tab
You can also create your own tabs and put whatever you whish onto those tabs.
Again, you add a new tab by using the Add Tab
![]() icon in the toolbar, the tab's context menus or by copy pasting an existing
tab.
icon in the toolbar, the tab's context menus or by copy pasting an existing
tab.
When you create a new tab it will be placed as the last tab. You can reorder the tabs (including the ones you can not otherwise change) by dragging a tab handle onto another tab. The dragged tab will then be placed before the tag you drag it onto.
Copy, paste & delete
 You
can copy and paste any item on the desktop. You can also delete any item
which you are allowed to modify (items on the Welcome tab and items that you
have created your self.
You
can copy and paste any item on the desktop. You can also delete any item
which you are allowed to modify (items on the Welcome tab and items that you
have created your self.
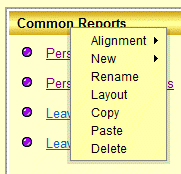
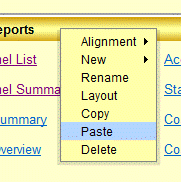
Copy, paste and delete are done using the context menus. Right click (control/command left-click on Opera) on the item you whish to copy, paste to or delete and select the action you whish to perform.
Note that you can copy any item. Also those that you can not otherwise do anything with. Thus you can copy reports, link groups and tabs from the set of standard tabs that are pre-defined in the HRT Desktop.
Whoops
 Oh
no, I just deleted the wrong tab.
Oh
no, I just deleted the wrong tab.
Well we did ask you if you where sure that you wanted to delete that tab didn't we?
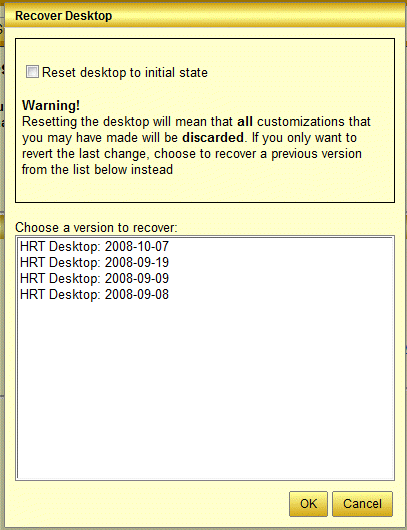
Oh well, luckily we do have a Whoops function. By clicking on the Recover Desktop icon in the toolbar you will be presented with a dialog where the latest versions of your desktop can be reloaded.
You can choose to recover an earlier version or to reset the desktop entirely to it's initial state.
Note that resetting your desktop will mean that you loose any customizations made.
The storing of backup versions will not be made after every single change that you make (for storage space and performance considerations). Backups will be made as follows.
Every time you make a persistent change to your desktop the server will check if a backup is to be made.
If the latest version is more than 24 hours old a new version will be saved.
Versions older than 30 days will be removed.