Scheduling an Expenditure Overview Report
About this tutorial
On this page, it will be depicted how to define, store and schedule a normal CET report that shows all the expenditure occurring this year for a certain organic unit. You will learn how to store a prepared 'Transactions by Cost Centre' report. Once the report has been stored in the report folder it will be scheduled for weekly execution (every Monday).
This example serves as general demonstration how to schedule normal HRT or CET reports. However this specific example showing the expenditure for a certain organic unit or budget code can only be reproduced if you have sufficient CET privileges (e.g. you are a budget holder).
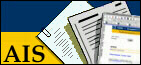
The report we are going to build will be scheduled every week and the resulting notification email may look like the following screenshot.
At the end of all the steps presented below, such an email is sent to you and to all other people you possibly specify as recipients of the scheduled report to be created below.
Step by step
Preparing the CET report
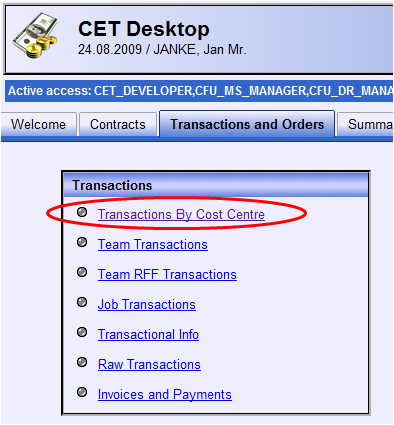
First of all, open the CET menu using your favourite browser by navigating to https://cet.cern.ch/. On the desktop choose the report "Transactions By Cost Centre" from the "Transactions and Orders" tab.
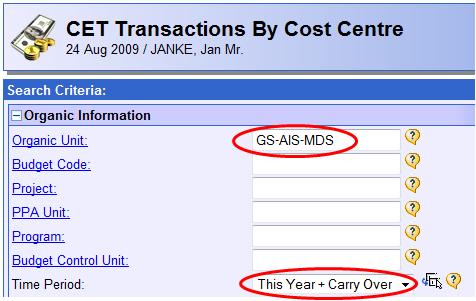
Now we are ready to specify the search criteria for our report. In this example we want to show all the expenditure related to the section 'IT-AIS-MDS'. You should replace this organic unit with a unit or a budget code you are a budget holder for. Please make also sure that the time period is set to 'This Year + Carry Over'.
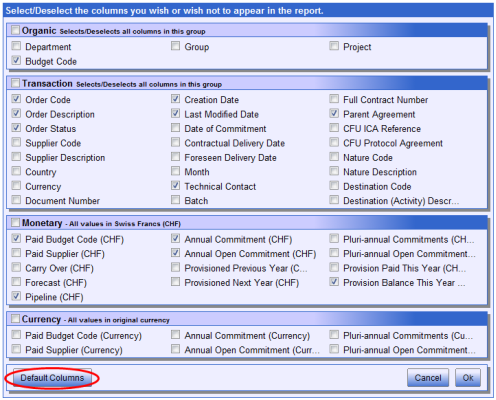
When you have finished specifying the necessary search criteria, please select the columns to appear in the report results. If necessary you can also specify specifically adapted orderings. To change the selected columns, go to the button bar at the button of the report form. There you find a button called 'Columns'. Click it to open the column selector window.
When the column selector window has been opened you are free to choose the columns which may be of interest for you. In this example, we have chosen to select the default columns. Once you have selected the columns which are of interest for you, close the column selector by pressing 'Ok'.
Storing the report
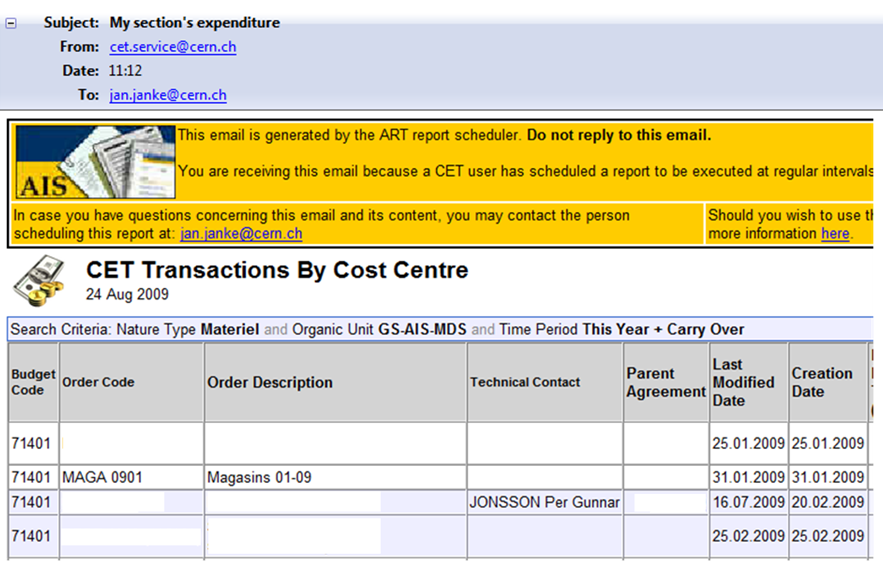
The report should be completely setup by now. All search criteria, orderings and columns are specified. So it is time to store the report. To do so click the button 'Store Report' in the button bar below the report form.
You will be led to the ART Folder Browser which opens itself in a new window. Choose a convenient folder for your report (2). You can create a new folder if you want to. Once, you have selected a suitable folder, click the link at the middle of the top bar (3). A small dialog (4) allows you to enter a name for the newly stored report. When you have finished selecting a name, confirm your choice with 'OK' and a new report will appear in the list of reports (5).
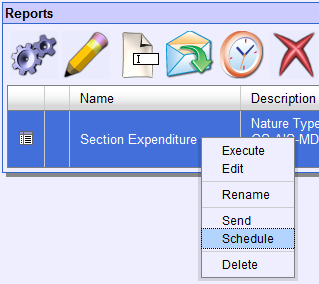
Now that the report is stored, it is possible to schedule it for automatic unattended regular execution. To activate scheduling, you have to edit the report's scheduling settings. To do so, make sure that the report is selected and then click the "clock" button in the button bar at the top of the window or choose the entry "Schedule" from. The Scheduling Settings Editor will be opened in a new window.
Scheduling the report
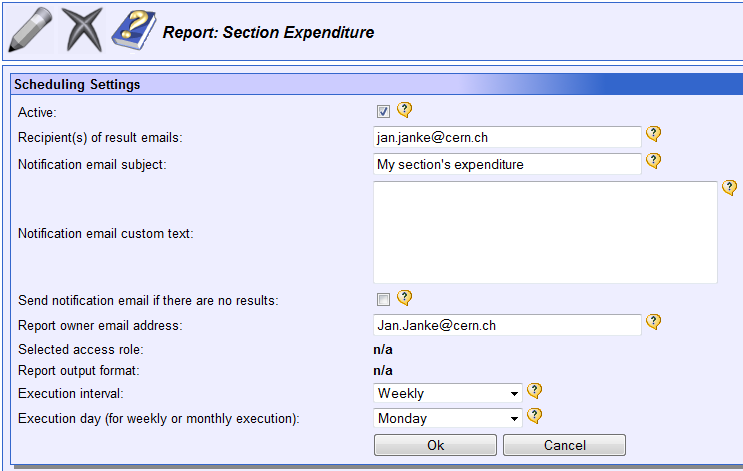
You have to supply some basic settings in order to be able to activate scheduling. First of all, make sure that the settings are active by verifying that the 'Active' checkbox is checked. Then you must provide at least one recipient email address. In order to just test the report, we recommend that for the first couple of days you send the report only to yourself. Then when everything is fine and the report is in a good shape you can start sending it to other people.
If you want to send the report to more than one email address, separate the different email addresses by comma.
Apart from the recipient email address, all other settings are optional. You may want to specify a meaningful email subject and an additional text giving further information to the people receiving the report's results.
It is not possible to change the email address of the report owner. Your personal CERN address is automatically fetched and inserted in the settings. This email address will be used when there are any errors or other problems that make a successful report execution impossible. This address will also be included in the generated email as contact address for the recipients in case they have questions concerning the report itself or its results.
The owner's email address will not be used to send you the results of a successfully run report. So unless you include your email in the recipients list, you won't get the report's results.
When you are happy with the provided settings, press the 'Ok' button. From now on, the report is actively scheduled.
Don't forget to change the execution interval by using the two last drop-down lists in the above screenshot. We want to execute this example report once per week every Monday. When the execution interval is correctly set, save your changes by pressing 'Ok'. If you want to undo your changes you also have the choice of selecting the 'Cancel' button.
After having pressed the 'Ok' button within the Scheduling Interval Selector, the scheduling settings are automatically saved. The report stored as 'Section Expenditure' will now be executed automatically every Monday and sent to all the specified recipients.