
Virtual Units Help
Contents
Introduction
|
|
Please
Note! |
What are the Virtual Units?
Virtual Units provide a means to group organisational units of different types under a common name. A Virtual Unit can be later referred to in the input fields of the application form. Every time a Virtual Unit is used, a report queries for all the components of that unit.
A Virtual Unit is composed of Virtual Unit items. These items can be:
- Persons
- Organic Units
- Budget Codes
- Contracts
- PPA Units
- Projects
- Experiments
- Institutes
- Programs
- Sub-Programs
The Virtual Units will be assigned a type, depending on the items they contain. If a Virtual Unit contains only one category of components, its type will match the type of the components, that is one of:
- Person
- Organic Unit
- Budget Code
- Contract
- PPA Unit
- Project
- Experiment
- Institute
- Program
- Mixed
The last, 'Mixed' type will be assigned to the Virtual Units containing more than one category of items.
Where to find them
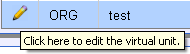
The Virtual Unit Editor, which allows to create and manage Virtual Units, is available from the
Desktop
of the HRT and CET applications. You can access it by clicking on the
hyperlink next to the icon![]() in the Services menu bar.
in the Services menu bar.
How to use them
Each Virtual Unit may be referred to in the application reports in the same way that organic units are referred. The name of the Virtual Unit can be entered into a report (e.g. Transactions By Cost Centre, Team Transactions etc) input fields such as Organic Unit, Budget Code, PPA Unit or Institute etc. The following input fields support Virtual Units:
- Organic Unit
- Budget Code/Cost Centre
- Contract
- PPA Unit
- Project
- Experiment
- Institute
- Program
If in doubt whether a particular input field accepts Virtual Units, please refer to the help available for that input.
Managing Virtual Units
Clicking on hyperlink next to the
![]() icon on the Services menu bar will take you to the
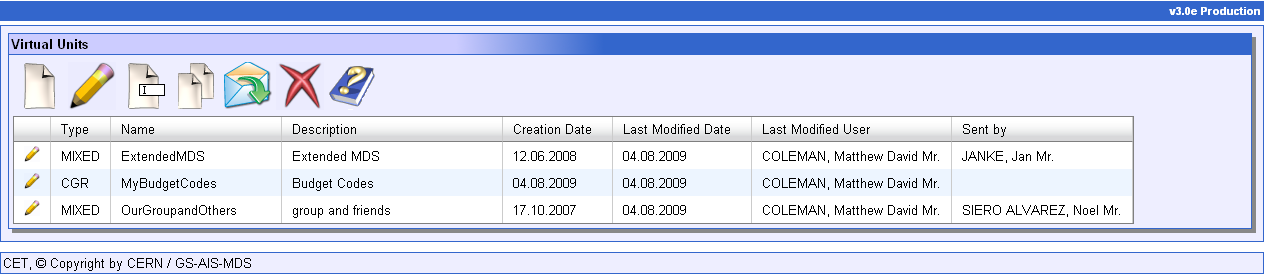
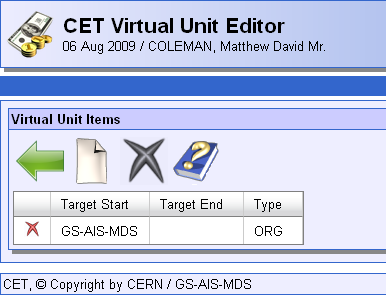
main screen of the Virtual Unit Editor. There is one common Virtual Unit Editor for both the CET and HRT applications, but
the interface will change to the right theme depending on if you are using
CET or HRT. Therefore the set of Virtual Units is common for both of the applications and changes made in one application will be immediately reflected in the other one. The screen shown below
comes from the CET application:
icon on the Services menu bar will take you to the
main screen of the Virtual Unit Editor. There is one common Virtual Unit Editor for both the CET and HRT applications, but
the interface will change to the right theme depending on if you are using
CET or HRT. Therefore the set of Virtual Units is common for both of the applications and changes made in one application will be immediately reflected in the other one. The screen shown below
comes from the CET application:
Creating a New Virtual Unit
To create a new Virtual Unit, simply click on the
![]() icon in the Virtual Unit Editor, it will take you to the
'Creating a new virtual unit' screen, shown below:
icon in the Virtual Unit Editor, it will take you to the
'Creating a new virtual unit' screen, shown below:
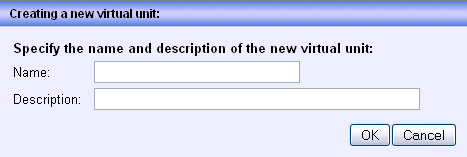
Enter a name and description for the Virtual Unit. The description will quickly remind you of the contents of the Virtual Unit and is only for your reference.
Note: The name of the Virtual Unit cannot have spaces and special characters since the name will be used in input fields on normal CET/HRT reports. For the description at least one character has to be entered and special characters cannot be used.
The Virtual Unit is now made but has not
items. When the Virtual Unit does not have any items then this icon
![]() will appear in the 'Type' column.
will appear in the 'Type' column.
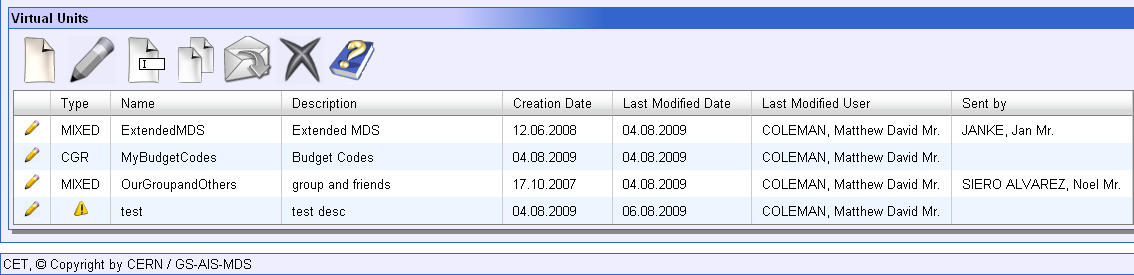
Note: Due to the Virtual Unit not having any items, the Virtual Unit cannot be used in a report. To activate the Virtual Unit you will need to add at least one item.
Deleting Virtual Units
Deleting a Virtual Unit is straight forward. All
you have to do is click on the Virtual Unit and click on the![]() icon from
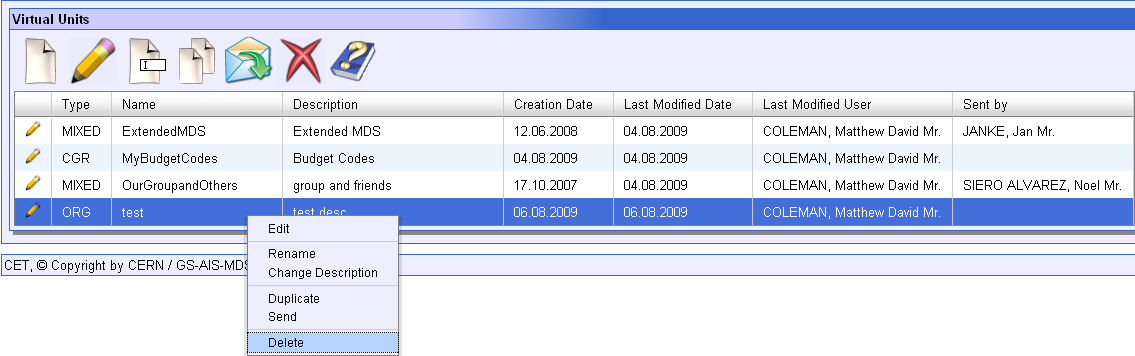
the tool bar at the top of the menu. There is another way to delete a
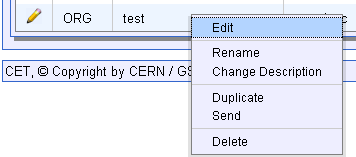
Virtual Unit. Right click on the Virtual Unit to get a context menu then
select the 'Delete' option from the context menu. Below is how the
context menu looks:
icon from
the tool bar at the top of the menu. There is another way to delete a
Virtual Unit. Right click on the Virtual Unit to get a context menu then
select the 'Delete' option from the context menu. Below is how the
context menu looks:
Adding Virtual Unit Items
To add items to a Virtual Unit you use the ![]() icon.
To use this edit icon you need to select the Virtual Unit you want to edit.
To do this just click once on the item row and the edit icon will be
available to be used from the tool bar at the top of the menu. There are two
other ways to edit the Virtual Unit. The
icon.
To use this edit icon you need to select the Virtual Unit you want to edit.
To do this just click once on the item row and the edit icon will be
available to be used from the tool bar at the top of the menu. There are two
other ways to edit the Virtual Unit. The ![]() icon can be clicked directly on the row
icon can be clicked directly on the row
 .
.
The last way is to use the context menu given when right clicking on the Virtual Unit you want to edit. Then select 'Edit' from the menu:
Any way mentioned above will take you to the same Virtual Unit Items menu.
The following screen will be presented to you:
To add an item the
![]() icon
needs to be clicked on. This will them show a pop-up that will allow you to
enter one or many items. This pop-up looks like this:
icon
needs to be clicked on. This will them show a pop-up that will allow you to
enter one or many items. This pop-up looks like this:
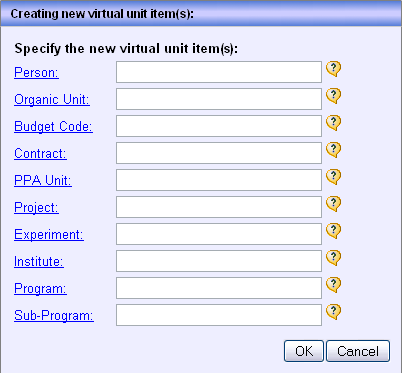
To add items complete one or more of the input fields, using the search screens
(hyperlinked field names on the left) if you need to. You may enter one or several items in a single input field, separating them with commas. In most of the inputs
they also accept ranges of values. To add a range you need to use a colon ':' as a separator
e.g.
 .
Certain input fields, like 'Person' do not accept multiple values. A
warning
will inform you if your selection cannot be used.
.
Certain input fields, like 'Person' do not accept multiple values. A
warning
will inform you if your selection cannot be used.
Deleting Virtual Unit Items
Deleting a Virtual Unit Items cannot be simpler. All
you have to do is click on the
![]() on
the item row. There are two other possible ways to delete an item. The first
one is to select the item (clicking on the item row once) you want to delete
and then click on the
on
the item row. There are two other possible ways to delete an item. The first
one is to select the item (clicking on the item row once) you want to delete
and then click on the
![]() on
the tool bar (up the top of the items menu). The second one is to right click to get
the context menu. The only option in this context menu is to
delete the item you selected.
on
the tool bar (up the top of the items menu). The second one is to right click to get
the context menu. The only option in this context menu is to
delete the item you selected.
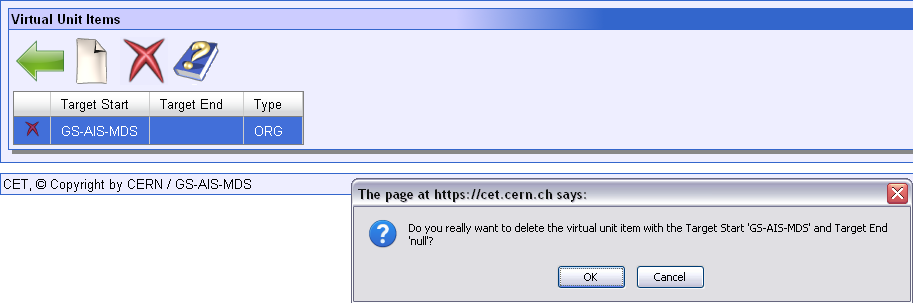
Any way you choose to delete an item will be met with warning pop-up asking you if you really want to delete the item. This warning will look like this:
Duplicating Virtual Units
Duplicating/Cloning will allow you to create a new Virtual Unit with a different name but with the same description and contents (items). This allows for rapid creation of a similar Virtual Units. The name of the new duplicated Virtual Unit is the same as the one you are duplicating but with "Clone" added to the end to you know which one is the duplicated one.
Duplicating a Virtual Unit can be done by selecting
(clicking on the Virtual Unit row once) the Virtual Unit you want to
duplicate and clicking on the![]() icon
in the tool bar on the Virtual Unit Editor menu.
icon
in the tool bar on the Virtual Unit Editor menu.
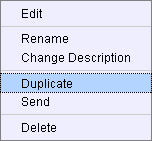
Also another way to duplicate is to use the context menu (right clicking on the Virtual Unit) and selecting Duplicate. This is shown below:
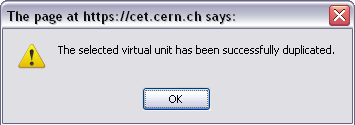
Once the Virtual Unit is duplicated you will see an alert pop-up that informs you that is has been copied.
Then the new duplicated Virtual Unit will be with your other Virtual Units. Like this below:

Sending Virtual Units
To send a Virtual Unit there are two ways. First is to
use
![]() icon by selecting the Virtual Unit you want to send and clicking on the
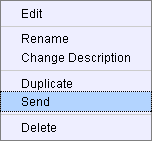
icon. The second is to use the context menu (right clicking on the Virtual
Unit to be sent):
icon by selecting the Virtual Unit you want to send and clicking on the
icon. The second is to use the context menu (right clicking on the Virtual
Unit to be sent):
Both take you to the pop-up screen below:
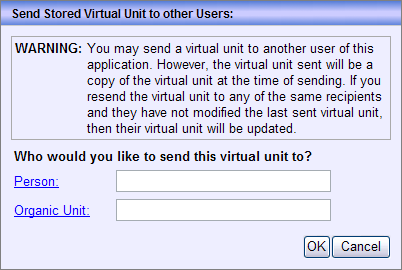
The send will allow you to send a Virtual Unit to a specific person or organic unit. If you need to search for a person or organic unit then use the hyperlinked field names.
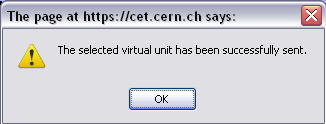
If everything was correct, you will be greeted with an alert box like this below:
Note: The sent Virtual Unit will not be changed for the recipients if you modify anything on the same Virtual Unit after you have sent it. If you resend the Virtual Unit to any of the same recipients and they have not modified it since, then their Virtual Unit will be updated. However if any changes have been made to the Virtual Unit they will get a new copy of the Virtual Unit.
Renaming a Virtual Unit
The renaming of a new Virtual Unit is simple. There are
two ways of renaming a Virtual Unit. The first is to select the Virtual Unit
you would like to rename and click on the![]() icon
in the tool bar. The other way is to right click on the Virtual Unit to
bring up the context menu.
icon
in the tool bar. The other way is to right click on the Virtual Unit to
bring up the context menu.
Once the menu is shown select 'Rename':
Either way will make the Virtual Unit name available to be edited like below:
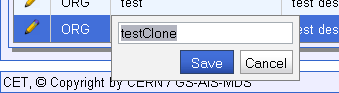
Note: Again with the name there cannot be any spaces and/or special characters in the new name. Also if you change the name, this new name will need to be referred to in CET/HRT reports.
Changing a Virtual Unit Description
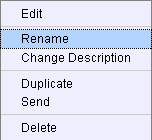
There is only one way to change the Virtual Unit description. All you have to do is right click on the Virtual Unit you want to change the description for to get the context menu:
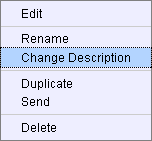
Select 'Change Description' and you will be met with the same looking text box editor like for the renaming but for the description:
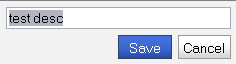
Note: Changing the description can still not allow for special characters.